
Emergency storm roof repair for a Pickering family home
Rapid assessment and repair after severe wind and hail, prioritizing watertight details and long-term value
What we faced when the storm hit
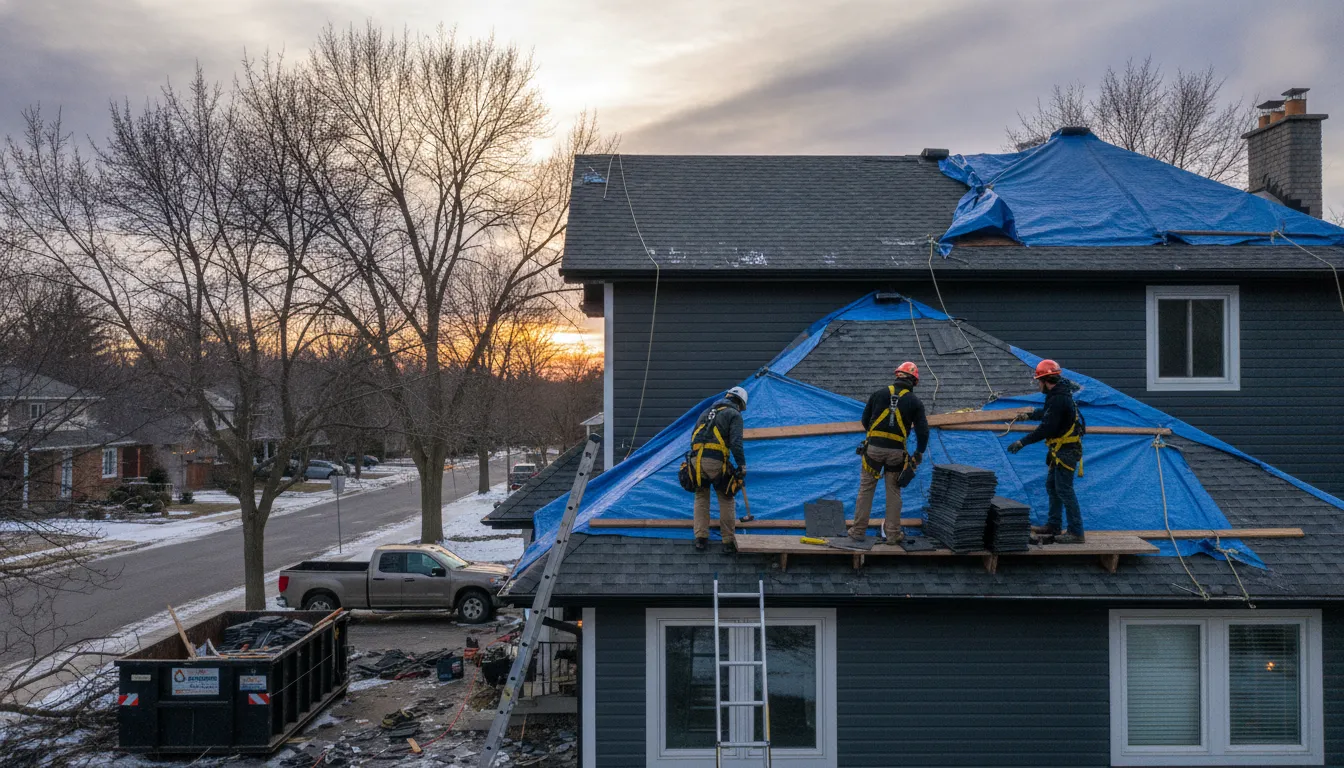
A two-storey home in Pickering presented with widespread shingle loss and torn flashings following a late-season storm. Neighbours reported similar damage across the neighbourhood, and the homeowners were understandably concerned about leaks and interior damage. Our work began with a careful triage to stabilise the roof and plan a durable repair.
Roof condition on arrival
We found multiple areas of missing architectural shingles, uplifted ridge caps and split vent boots. Granule loss and exposed underlayment in places increased the risk of moisture penetration, especially in valleys and around penetrations.
Access and seasonal constraints
This home sits on a narrower lot typical of Pickering suburbs, with limited driveway space and overhead trees that complicated staging. Because the storm occurred in the cooler shoulder season, we had to select materials and adhesives suitable for lower temperatures and work within shortened daylight hours.
Homeowner priorities
The owners wanted a repair that restored performance without unnecessary replacement, while improving long-term resilience against future storms. They also requested clear documentation for their insurer and reassurance about code compliance and warranty.
Our approach — step by careful step
- 1
Emergency stabilisation and temporary protection
First, we secured any open areas with breathable synthetic tarps and installed temporary flashing over exposed valleys to prevent water ingress. This stop-gap measure gave the interior time to dry and allowed us to plan a permanent repair without risking secondary damage.
- 2
Comprehensive inspection and scope development
We performed a full walkaround and rooftop inspection, documenting uplifted nails, deck exposure and flashings around chimneys, vents and skylights. Photos and a concise scope were prepared for the homeowner and their insurance adjuster, noting code-relevant items such as ventilation and eave protection.
- 3
Selective tear-off and substrate repair
Rather than a full replacement, we removed damaged field shingles, ridge caps and failed flashing assemblies down to the plywood deck where necessary. Any soft or delaminated sheathing was replaced with exterior-grade plywood and fastened to manufacturer-spec spacing to restore a stable substrate.
- 4
Premium underlayment and flashing upgrades
We installed a self-adhered starter at eaves and a synthetic, ice-and-water-resistive underlayment in valleys and low slopes to meet Ontario code considerations for cold-season ice dam risk. All step and counter flashings were replaced with 24-gauge galvanized steel, sealed with compatible butyl sealant at vulnerable seams.
- 5
High-performance shingle application and ventilation check
Architectural laminate shingles were matched in profile and colour and applied with corrosion-resistant, ring-shank nails at proper exposure. We reset ridge ventilation with a continuous ridge vent where possible and verified intake at the soffits to preserve balanced attic ventilation and reduce condensation risk.
How the home is better for the work
The repair returned the roof to a durable, code-conscious condition while addressing the homeowners’ desire for lasting value. We prioritised details that reduce future leak risk and simplified future inspections.
Improved weather performance
With new self-adhered underlayment in critical areas, upgraded flashings and properly fastened architectural shingles, the roof now resists wind uplift and water intrusion far better than the storm-damaged assembly it replaced.
Durability and maintainability
Replaced sheathing and solid fastening restore structural integrity; using 24-gauge galvanized flashings and high-quality synthetic underlayments extends service life and simplifies any future repairs. The chosen shingle manufacturer offers a standard warranty, and we documented our workmanship warranty in writing.
Clear documentation for peace of mind
We provided a detailed repair report with photographs, a materials list and ventilation notes suitable for the homeowners’ insurer. This paper trail helps the family in Pickering and their neighbours understand the work performed and any recommended maintenance schedule.
Questions homeowners ask after storm repairs
How long does an emergency storm repair like this usually take?
A targeted repair for wind and hail damage on a two-storey home is often completed in one to three days depending on the extent of deck replacement and weather. Emergency stabilisation can be done within hours to limit interior damage, with permanent repairs scheduled as soon as materials and permits (if required) are arranged.
How disruptive is the work to daily life?
We stage equipment carefully to minimise disruption on narrower Pickering streets and coordinate material deliveries to avoid blocking neighbours. You’ll see crews on the roof for short bursts each day; we keep work areas tidy and protect yards and entryways during the process.
When should I call for an emergency repair after a storm?
If you notice missing shingles, visible daylight through the attic, new interior stains, or loose flashing, arrange an assessment promptly to prevent secondary water damage. Quick action is especially important in the America/Toronto time zone’s cooler months when freeze-thaw can worsen leaks.
Will this be covered by insurance and what documentation do you provide?
Coverage varies, but insurers typically require a scope of damage and photos; we supply a clear report with material specifications and before-and-after images to support claims. We avoid quoted dollar figures but will work with homeowners and adjusters to clarify the necessary repairs.